
Let’s Talk Cinnamon Rolls
I mean, what more can you ask for during the fall season? Wait. Any season? Every day? Every meal?
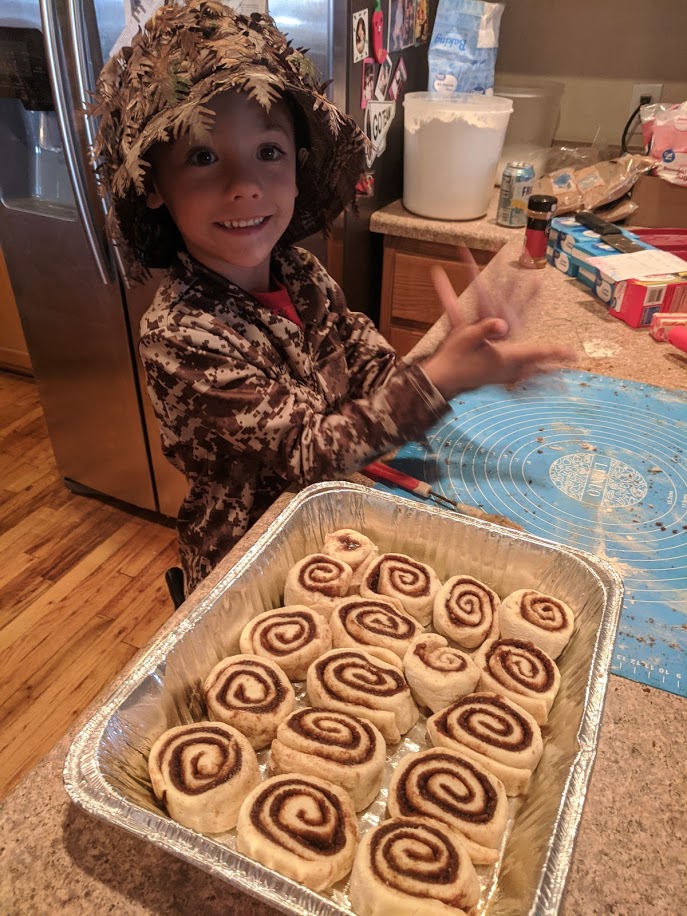
Walter bear was in the kitchen with me and my mom and let me tell you, his baking game is strong. Pretty much everything Walter does is done with a mysterious and magical form of bad-assery. Seriously. He even laughed in the face of being born 8 weeks early and refused to need any oxygen. He handles his shit on his own, guys. He’s that way in the kitchen. He pretty much shooed me away and rolled an entire cinnamon roll up by himself and cut the thing with string. He’s five. He’s beautiful. He’s my best boy. He’s a marvel. I love him. I love cinnamon rolls. I love making cinnamon rolls with my best boy.
I first came across this recipe on Pinterest and what caught my eye was how much easier it was than the beautiful Pioneer Woman’s recipe for cinnamon rolls. Guys, I seriously make everything from the Pioneer Woman. I’ve tried so many of her recipes that my hair was starting to turn a hint of red-orange, so to veer from one of her recipes is saying something. These cinnamon rolls are that good. The only caviat about these is that if you’re not eating them right out of the oven, you might need to microwave them for about 15 seconds to let them soften back up. That’s it, though. Other than that, it’s like tasking one of God’s own cinnamon rolls. I ate seven in one day. Seven. Seven of them. Seven. Please pray for my waistline during this holiday season!

This recipe comes from The Stay At Home Chef, by the way. Thanks, girl! You’ve completed me.
Above you’ll see that we laid our ingredients out. We had about 18 people to hand cinnamon rolls out to, so we had a lot of baking to do and we had to be pretty organized about it. All the ingredients basically get dumped in one bowl and get mixed together with a dough hook until the dough doesn’t stick to the bowl. The dough should be tacky and not sticky. That is, it shouldn’t stick to your hands but it should feel pretty sticky when you pinch it. The dough gets transferred to a greased bowl (we used cooking spray) and you cover it and let it rise for an hour. We repeated this step about six times and had lots of bowls hanging out on top of my mom’s fridge. That’s her preferred place to let dough rise.

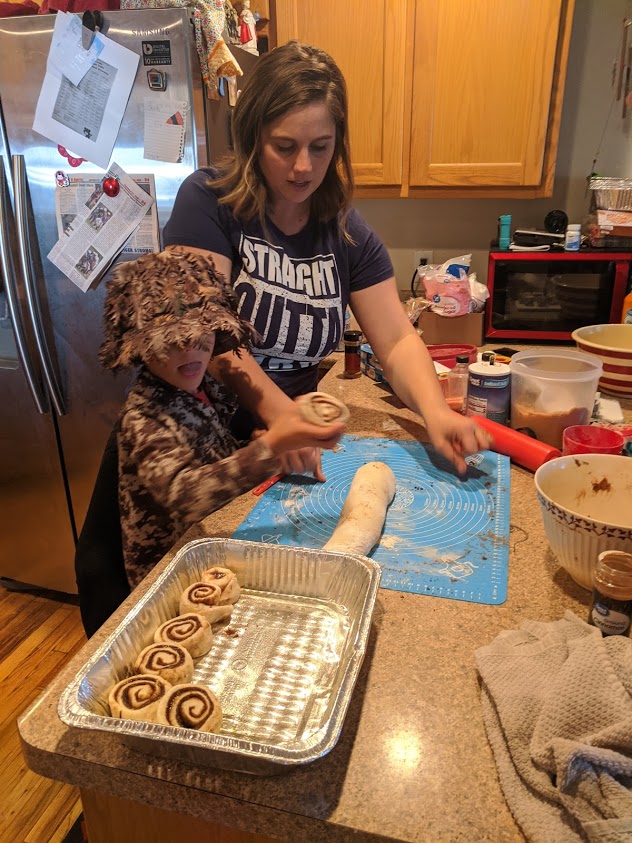
Then, you grab your local Walter bear and have him punch the dough down, which he will enjoy very much because he will be a five-year-old boy and anything he can punch will be very exciting. Then he’ll roll out the dough for you in a rough 12×18 inch rectangle. You’ll probably need to help him here and there.
After you do that, you melt a stick of butter and marvel at the sight of it being poured all over the dough. Use your hands to spread it out all over the dough. Resist the urge to lick your fingers. Did I just say that?
Mix together a ton of brown sugar and cinnamon and sprinkle it all over the buttah. Again, resist the urge. Roll that sucker up, cut it into twelve rolls and let them rise in their baking dish for about 30 minutes.
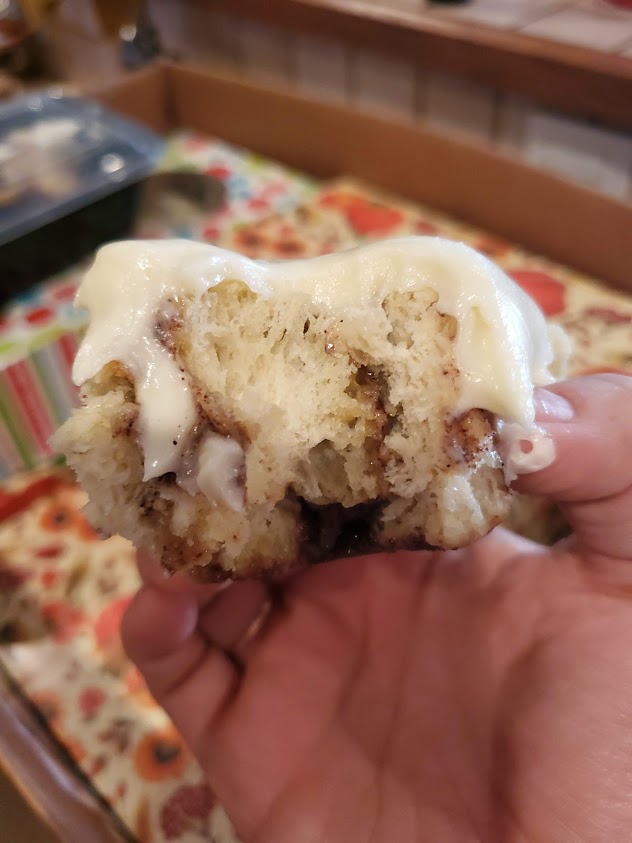
Bake at 325 degrees for about 18 – 20 minutes, depending on how many rolls you’ve put in your pan and how lightly golden they are on top. Pour your delicious cream cheese icing (recipe below) all over the top, go rouge and tear one right out of the batch and take a big bite. Try not to get emotional about it. Also, try not to eat seven.
Beautiful, isn’t it?
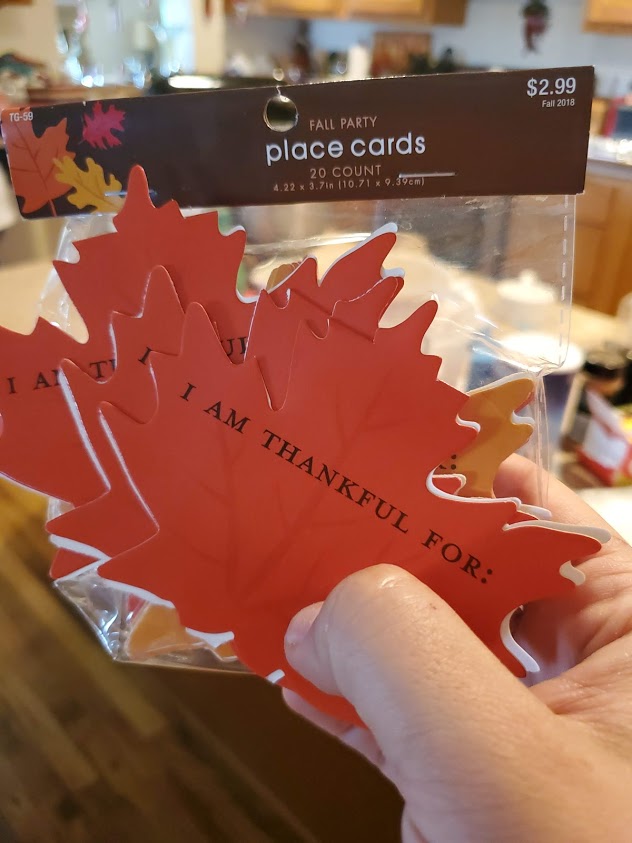
To make them even more special, my mom and I purchased these boxes and leaf-shaped cards at hobby lobby (for 50% off!) back in September. We lined the boxes with foil and placed 6 rolls in each box to hand out to our loved ones. We filled out our cards and taped them to the box. Below you’ll see what the boxes and cards look like for Walter’s kindergarten teachers.

My mom, siblings and I started this tradition of baking goodies during the fall and Christmas season a few years back and it is something that’s become really special to us. I love spending this time with my mom and siblings and now that I have babies of my own, we get to extend the memories and tradition to them. Sending our goodies to the people we care about makes it so special and really gives meaning to what the holiday season is all about. If you don’t do this already, you so should. It’s the best.

Recipe
Paraphrased from the Stay At Home Chef
Dough:
- 1 cup warm milk (warm to the touch, not hot)
- 1 tbs instant dry yeast
- 2 tbs white granulated sugar
- 1 tsp salt
- 3 tbs softened butter
- 1 large egg
- 3 cups all-purpose flour
Filling:
- 1 stick melted butter
- 2 tbs cinnamon
- 1 cup brown sugar
Cream Cheese Icing:
- 4 oz softened cream cheese
- 1/4 cup softened butter
- 1 – 1 1/2 cups powdered sugar
- 1/2 tsp vanilla extract
- 1 – 2 tbs milk
For the Dough:
- Place milk either in microwave or on the stove at low heat until warm but not hot.
- Place milk, yeast, sugar, salt, butter and egg into the bowl of your mixer with the dough hook attachment. If no mixer, use a wooden spoon and mix well until all the wet ingredients are combined.
- Gradually add your flour and mix on low speed until the flour is incorporated and then kick it up to a med-high speed to mix dough until it separates from the sides of the bowl and comes together. You can do this by hand, also.
- At this point, you’ll pinch the dough and see if it’s too sticky. If it sticks to your fingers, add in about 2 tbs at a time until you reach a sticky dough that doesn’t quite stick to your fingers.
- Lightly grease a bowl large enough for the dough to double in size and place dough into bowl. Cover loosely with plastic wrap or with a kitchen towel and let rise in a warm place for 1 hour.
- Punch down the dough and transfer to a flat, floured surface and form it into a rough rectangle shape.
- Roll dough out to 12 x 18 inch rectangle.
For The Filling:
- Melt butter and pour over the rectangle-shaped dough. Use your fingers or brush to spread the butter all around the rectangle.
- Mix brown sugar and cinnamon and sprinkle over butter, covering the butter completely
To Assemble Roll:
- Starting from one side of the dough, carefully roll across until you reach the other side, then start over and move to the opposite side.
- Repeat until you’ve rolled the entire roll.
- Carefully turn the roll fold-side down so that the roll will not come apart while you are cutting it.
- Using a sewing thread, fishing line, or knife, cut the roll into 12 even sections and place, touching, in a baking dish with 2-inch sides.
- Cover loosely with plastic wrap or kitchen towel and let rise for 30 minutes.
- Bake at 325 degrees for 18 – 20 minutes or until just lightly brown on top.
- Right out of the oven, pour cream cheese icing on top.
For The Cream Cheese Icing:
- Mix all ingredients together except milk, slowly adding the powdered sugar so you don’t powder your face and your whole kitchen. Add milk a little at a time until you get a runny, dreamy consistency to pour all over your cinnamon rolls. Resist the urge to eat it all before the cinnamon rolls come out of the oven.
Dad (grand pa to you)
Walter they look great I’m hungry for some right now. Nice job you baking son of a big dog mamer jammer!